How to Make a One-Time Payment Without Enrolling
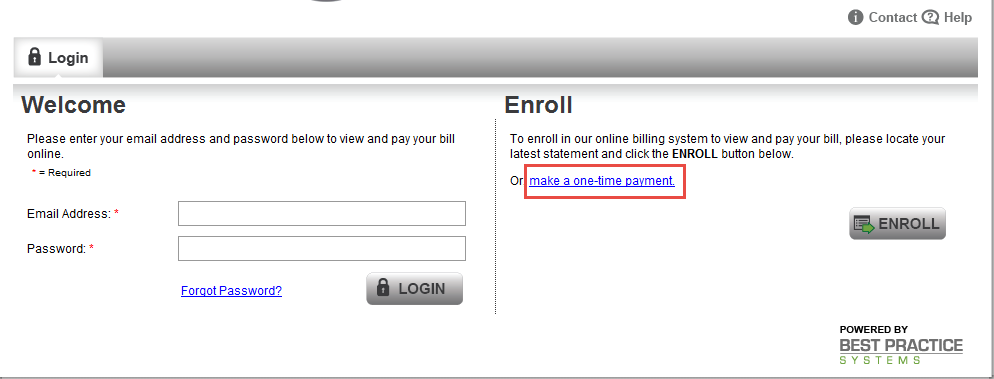
You may make a quick payment without enrolling by clicking the link “make a one-time payment” located in the Enroll side of the VueBill Welcome Page. Please note that this option allows you to make a single payment for the Total Current Charges noted on a single specific invoice, but not future Scheduled payments. Further, you will not have access to a rendered invoice PDF and you may not save Payment Methods or create email notifications. You will be required to submit account-related information to validate your account as well.
1) Click on the make a one-time payment link in the Enroll section of the Vuebill home page.
2) Enter the Account# listed on your invoice.
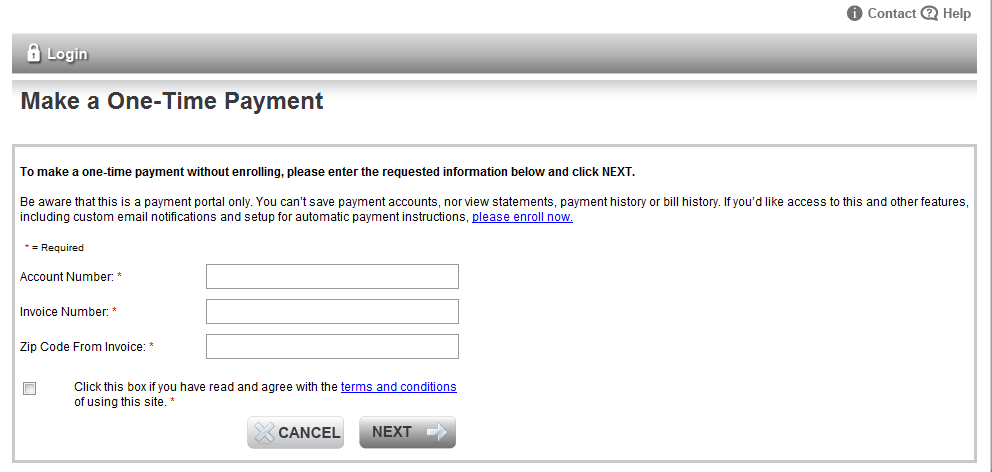
3) Enter the Invoice# listed on your invoice.
4) Enter the 5-digit billing Zip Code listed on your invoice.
5) Click the Next button.
6) The Account and Payment Date are not editable. Payments made here cannot be scheduled in the future.
7) Enter the amount you wish to pay.
Note: You may not pay less than $0.01 or more than the suggested amount that is pre-populated in the Amount to Pay field, which is typically the total or remaining Current Charges for that invoice. If your Balance Due on the invoice is more than the total Current Charges, you will need to locate the OPEN invoices that comprise the remaining Balance Due to make any additional one-time payments to clear the balance.
8) Select the appropriate Payment Method from Payment Method drop down: Bank Account or Credit Card.
9) Enter payment information: bank account or credit card information and click Next.
|
Bank Account: To make a payment via a bank account debit, add the information noted below. You may not save this payment method and use it later. Payment Methods can only be saved when Enrolled.
· Account Holder's Name: Type in the person's name that is listed on the bank account. · Routing Number: The 9-digit routing number can be found on the bottom of your check. If you are not sure how to locate the Routing Number, please click on the See an Example link on the screen. · Account Number: The Account# is found to the right of the Routing Number on the bottom of your checks. The Account# cannot be greater than 17 digits, nor fewer than 4. If you are not sure how to locate the Account#, please click on the See an Example link on the payment screen. · Account Type: There are two options. Click to select either Checking or Savings. · Click Next to go to the Verify Payment Screen. |
|
|
|
Credit Card: To make a payment with a credit card, add the information noted below. You may not save this payment method and use it later. Payment Methods can only be saved when Enrolled.
· Name on Card: Type in the person's name listed on the credit card. First and last name are required. · Billing Address: Type in the billing address of the person listed on the credit card. · City: Type in the billing City of the person listed on the credit card. · State: Select the billing State of the person listed on the credit card from the drop down list. · Zip: Type in the billing Zip Code (5-digits) listed on the credit card. · Card Type: Select the Radio Button for the type of Credit Card Account you are using (Visa, MasterCard, or American Express). · Account#: Type your credit card Account# as it appears on your card (no dashes or spaces). · Expire Month: Either type the month (example: 09 for September) or click on the drop down box and select the month your card expires. · Expire Year: Either type the year (example: 2015) or click on the drop down box and select the year your card expires. · Security Code: Type in your 3-digit CVV code for Visa or MasterCard (found on the back of card), or your 4-digit CVV code for American Express (found on the front of card). · Click Next to go to the Verify Payment Screen. |
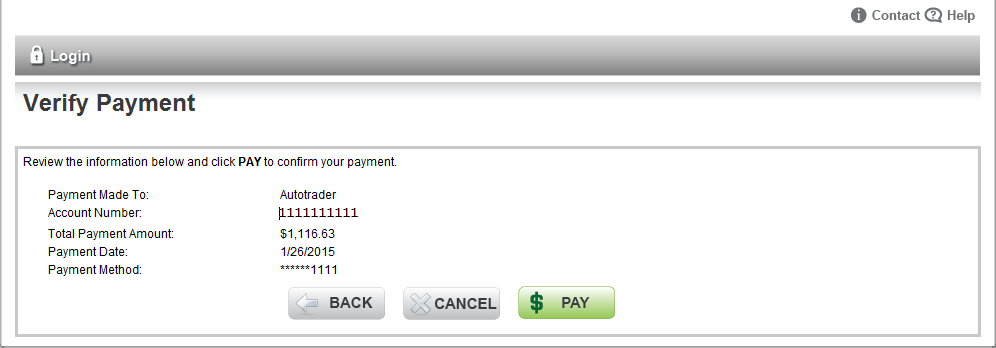
10) If the information displayed on the Verify Payment page is correct, click the green PAY button to process the payment.
11) If the payment information is not correct, or you wish to edit the payment, hit the gray BACK button (not the Internet browser’s back arrow) to make the changes.
12) Once the user has reached the Payment Confirmation page, the payment is complete.
13) Enter an email address in the EMAIL field to send a copy of the Payment Confirmation.
14) Click the CLOSE button to close the window. This will take you back to the VueBill Welcome Page.
15) If the payment failed, you must start the process over again with a different payment method or contact your financial institution for assistance.